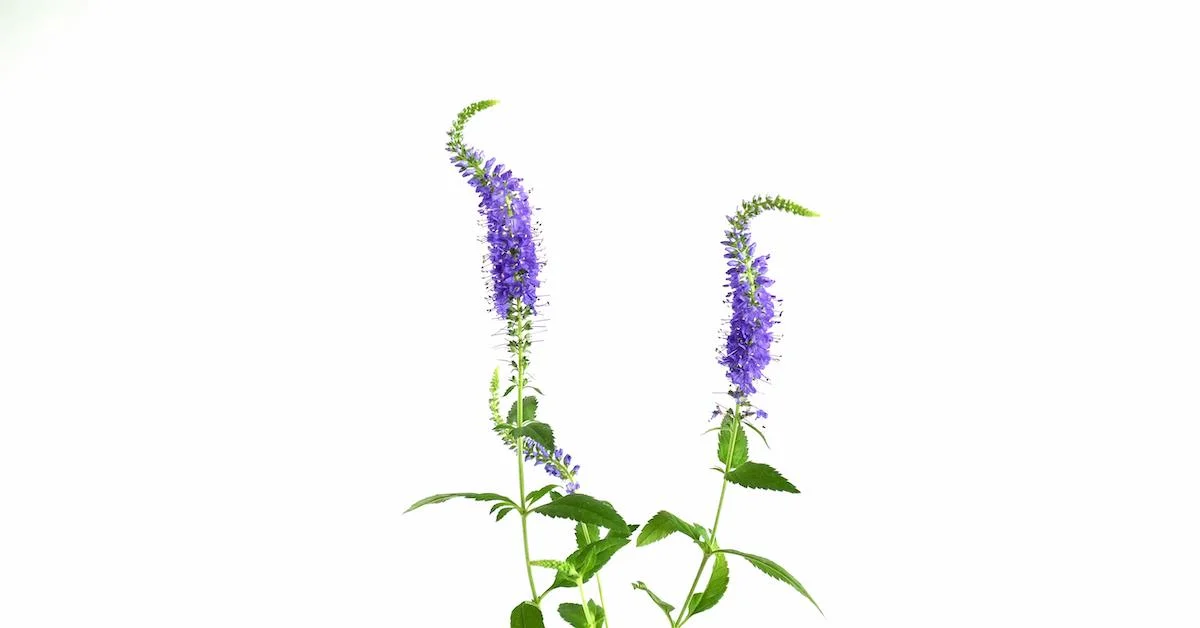
This is a great flower to use to bring color out the edges of your arrangement—especially when creating sculptural pieces! Even if you’re usually creating a round arrangement, you can use Blue Veronica to add a bit of whimsy to the design.
All in Videos
This is a great flower to use to bring color out the edges of your arrangement—especially when creating sculptural pieces! Even if you’re usually creating a round arrangement, you can use Blue Veronica to add a bit of whimsy to the design.
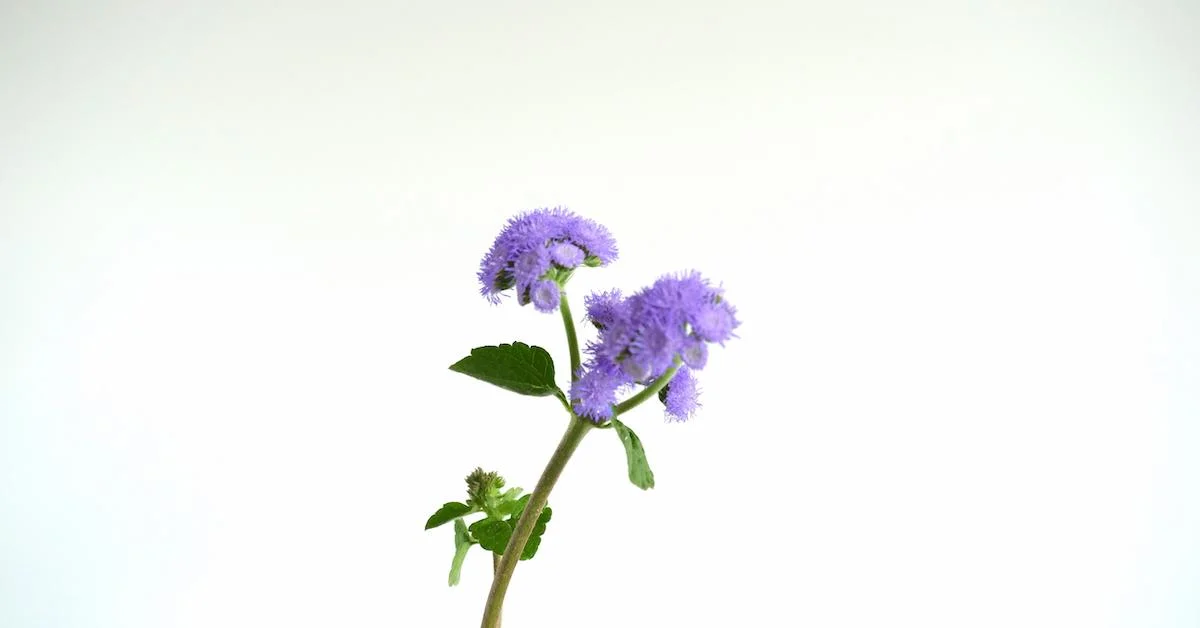
In this video, I’m here to teach you all about ageratum (pronounced “ah-jer-AY-tum”)! This flower comes in various colors—blue, pink, and white—and is native primarily to Central America and Mexico, but the United States also has several native varieties! Ageratum is easy to grow and is sometimes a perennial, which means it’ll come back year after year!
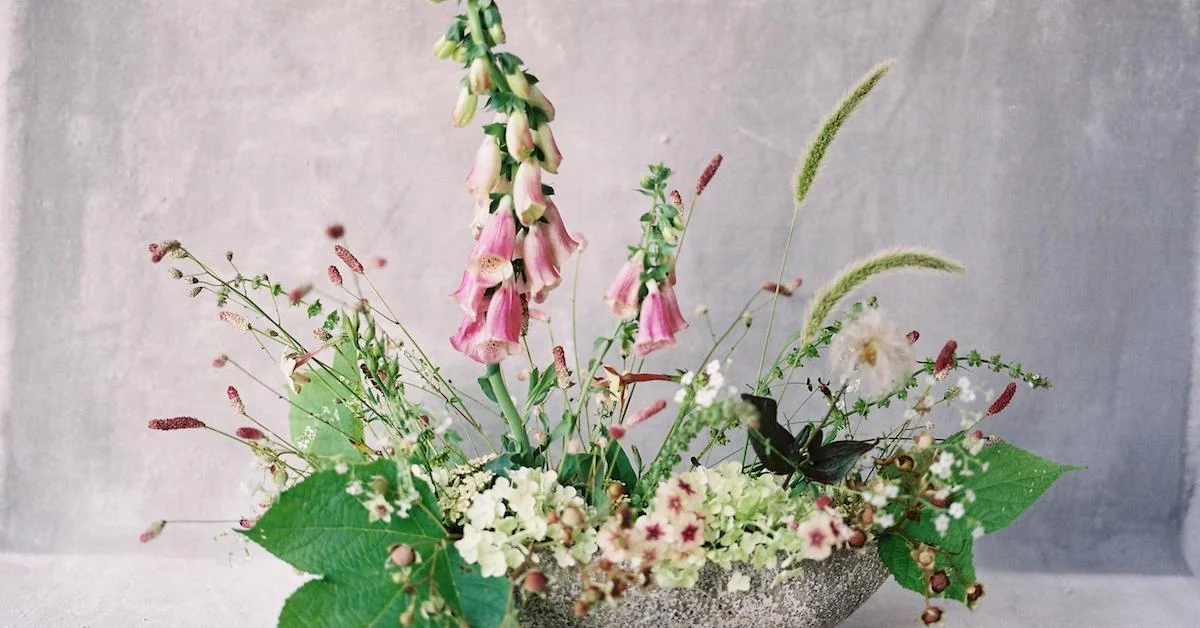
Flowers are more than just flowers. They are a conduit for passing the love and joy inside our hearts to others! In this video, I'm using a bright blend of spirea, geranium, sweet pea, ranunculus (charlotte and standard peach), garden spray roses, tulips and scabiosa.
This clip from the Team Flower Bouquets and Personals class demonstrates how to make a tailored bouquet. This type of bouquet is typically a little more round and classical in shape. In this clip, Kelly shows us how to create a more structured bouquet with a fun flair!
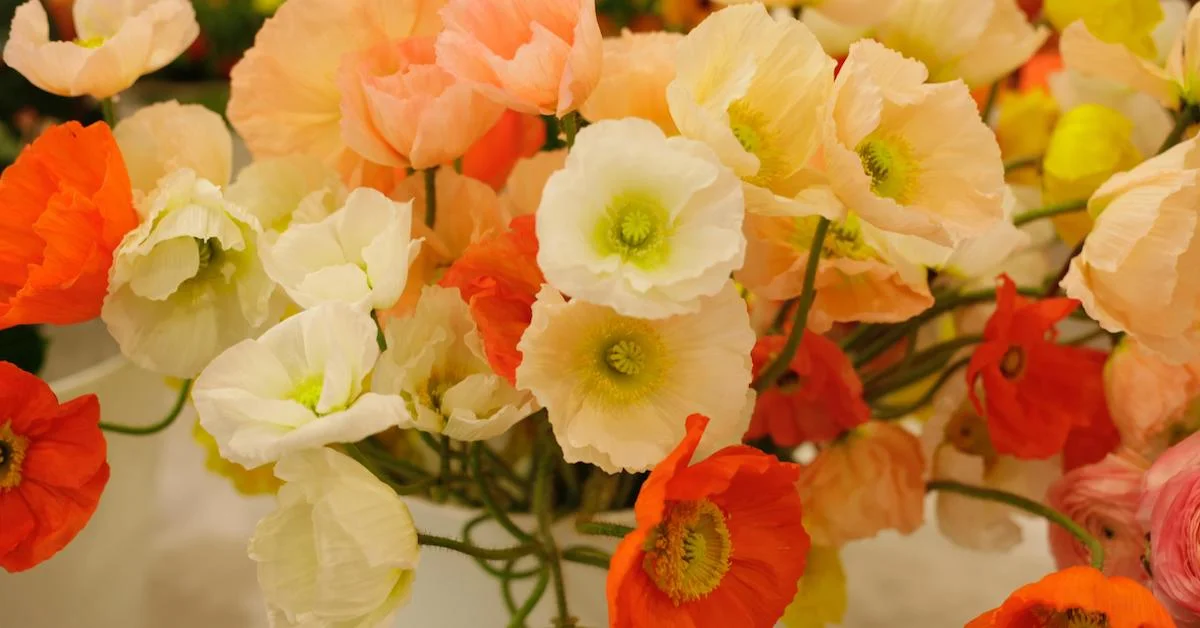
Watch as Kelly puts together a simple two ingredient arrangement. Poppies and Solomon's Seal are a sweet late-spring pair. This design is perfect for dressing up a windowsill at home, wedding bar or guestbook table on the fly!
Transcript
Hey, I'm back, excited to share an arrangement with you that this time only has two ingredients. I have Solomon's seal and poppies. I also have a message for you on the upper side of my camera. And it is that you are awesome. OK, have a flower frog in my container. This is also [INAUDIBLE] decor, if you're looking for one. Have my pieces of Solomon's seal are arranged by size. I have one that's long, and then two that are more of a smaller/medium size.
Gonna start with this one. We're going to go straight up. Going to be fun. And I'm going to clip it down just a little bit. Got a frog in here that's raising my levels. Whenever you're not using a lot of flowers, mention frogs are great, because they're just kind of pretty to look at. I think they look nice in an arrangement.
So I have to be as conscious about covering-- kind of the point is to show negative space in the arrangement. We're using the principle of design of radiation in this arrangement. Everything is going to-- all the lines are going to come out from one point with this base material that we're working with.
And for balance, I'm wanting to keep this as my center point, and then same amount both to the right and left. And what I'm doing with these pieces, I'm kind of moving around in this circle a bit, and I'm creating a little house for the poppies to live, making room for them.
So this is where we are. This is the front side of the arrangement, and my poppies are going to live in this area here. So we created the general shape, the general size, that goal of level one. We're not going to worry about covering the base. And this sort of is just another part of that. And then we're going to use the poppies as both level two and level three. We're going to have them work together to create a resting point for the eye. But then we're also going to use them to create movement through line.
Now, a lot of the times I like to use gradation in size whenever I'm arranging, but my smallest poppy has the shortest stem, so we're going to reverse that. This is probably technically-- let's see here. One third, it looks a little bit-- yeah, the poppy is a little bit too high proportion wise. So I'm going to let him come down a little bit.
I was reading somewhere that poppies like to drink through the little hairs on their stems. So getting them this way, you singe the ends to seal off that little wound, and then put them in deep water till they're properly hydrated as these ones are.
OK, so those are going to be my bottom two. With poppies, too, I think they're really pretty if you could just have their faces pointing in different ways as you work. They're all looking straight at you, staring you down, making you feel a little bit uncomfortable. Poppy etiquette.
So this is something that would be fantastic for a guest book table or bars, anywhere to add a little extra thing, only 10 stems, 10 stems, two ingredients. Big, the whole way down to small. We're doing this kind of trickle, faces up, faces out, moving in and out throughout the arrangement. OK. Be back with another one for you.
Burnout in the floral industry is something we’ve all either heard about or felt ourselves, and it can be caused by a variety of different things—one of which is physical pain or exhaustion. This video clip from the Team Flower Business Growth class gives you practical tips for body mindfulness and a self-scan.
In this video Kelly will show you all the beautiful blooms that commonly open in the summertime. Learn how to become a florist and take floral design classes online with Team Flower. Here you can even learn tips on flower gardening for beginners. We'll show you how to do flower arrangements in flower arranging videos.
Transcript
Stretching yourself is a good thing. Today, I decided to take some things that I had in the studio and create an arrangement that was a different shape, and definitely a different color palette than what I normally work with. This arrangement I have been waiting-- I've been waiting really all year for these turk cap's lilies to bloom. And this is one of the photos that I have in our living room here at home. And it has one of those beautiful lilies right here, and I always anticipate that coming out in July each year.
Something that's native to the southeast United States, so if you're in one of those states, keep your eyes peeled in woodland areas for these beautiful things to pop up. And if you aren't, still keep your eyes open. Some might have come and blown your way.
So this is a turk cap's lily. And I just wanted to use this opportunity to show you a few of the different ingredients that you might like to use for something that you have coming up in your future. So let's go through all of the different things that we have in here.
So of course, the lilies, which have inspired it all. And then we have some umbrella fern. And this is so great if you're trying to get a lot of volume in an arrangement, but maybe working on a lower budget. This spreads out so beautifully. You can use it as the big umbrella shape, or you could break it off into smaller pieces and use it in boutonnieres or something smaller if you wanted, as well.
We also have some really beautiful velvety geranium leaves here. Love them. They come in all different sizes.
And right below this here, with these sweet little pink berries, after they flower, but this is pokeweed, one of my favorite things to use in the summer time. It grows on a lot of hillsides. And you'll probably find some near you. So that's something that I really love to use in the summer time.
And here we have some basil, some flowering basil. And some lisianthus. And this kind has a pretty purple and white stripe in it. And if you dig closely and look back here in the arrangement, we're using some sweet orange spray roses.
And this beautiful reaching flower right here is called crocosmia. Hopefully I'm pronouncing that correctly. That's how they say it here. Sometimes I've found that, in different regions, they call the flowers different things, like for example I have some clematis is how I grew up calling it, but in the south they call it clematis. So that's one of the flowers we've got down in there.
I have some beautiful sphinx gold spray roses from Peterkort. Here, we have some liatris. And let's see. This dark foliage that you see is called ninebark. And this is a great thing to have in your garden. Grows up nice and bushy, and you can keep cutting on it.
I have some foxglove here. This is the light lavender purple. I have a piece of oak leaf hydrangea foliage. So that's fun to break off of the hydrangea and just use the foliage. I have a piece of hellebore leaf here, as well. A little bit of ivy, and some milk weed. And then right here, this is called gomphrena. It's a fun little textural piece here.
And then lastly, I have some orange ranunculus that I had left from a wedding last weekend that wasn't quite the right shade. So here it is. It works beautifully with this Dutch-inspired arrangement.
So that's your little tour of Boone here in July. I hope that you enjoyed it. And I hope it inspires you to go create some beautiful things with whatever is blooming in your neck of the woods. Keep moving forward, one step at a time.
I’m answering five questions on one of the most complex topics in the floral industry: pricing. No matter what realm of the floral industry you’re a part of, this subject has likely caused you a bit of a headache in one way or another. We all want to charge a fair rate, but we also need to pay ourselves. Where’s the balance? This clip from the Team Flower Pricing and Ordering class will shed some light on a few of the most asked pricing and ordering questions.
In this bouquet tutorial video, Kelly will show you the mechanics needed for a garden-style look. Learn how to become a florist and take floral design classes online with Team Flower. Here you can even learn tips on flower gardening for beginners. We'll show you how to do flower arrangements in flower arranging videos.
Transcript
Hi. I wanted to take you on a little flower tour of what's happening here in the beautiful mountains of North Carolina in May. We're working with some hydrangea foliage. And this will be really beautiful later this summer, with lots of blossoms and blooms. And in the fall, it turns the beautiful. It has little speckles of burgundy in it.
We have weigela here. One of my favorite flowers to work with because it can act both as a green and as a little punch of color. We have lupine here.
This is something that is really well known here in the mountains. We have a lot of this. A lot of this in the area is what you'll find growing sometimes at grocery stores. And of course, in backyards and things like that.
I have some lady's mantle here today as well. I have a few ranunculus that I had left from-- that I just decided I didn't like with what I was doing for an event last week. So I have a few of those that I might incorporate. Some ranunculus, I have some beautiful tree peonies from the garden out front.
And then we have some poppies. And we actually still have tulips up in the mountains since our season starts a little bit later than other people's. And then I have some pretty fun little apples from my apple tree out here in the backyard.
So there's the ingredients that we're going to be working with today. And I'm just going to show you a little technique for doing a simple hand-tied bouquet. But I also wanted to talk a little bit about efficiency as we go through it.
So whenever you've got your studio set up, and you're working on an event or a wedding, a lot of times with the bouquets, if you just jump into making it without having a plan in place before you go ahead with it, they can get really cumbersome. Because you're trying to strip a leaf here, and trying to hold your bundle of flowers here.
So something that I really love to do is have someone help me strip all of the leaves down to-- I'll just give them a little tutorial on where I'd like the leaves to be stripped to. And then, I-- especially if I'm doing several bouquets-- rather than having it all laid out on the table like this-- which is just so that you can see what we're working with today-- I just have it in little vases.
The ingredients for each bouquet would be in a vase. And they would just go through, and whatever my instructions were-- three stems of the hydrangea and three stems of the weigela and five stems of lupine. It would just will be all arranged there.
So then that makes actually putting the bouquet together really, really easy. And you can have another bucket on the side of just an extra thing. Sp sometimes, these underrate pieces to all work together. So you can trade out some pieces from maybe an extras bucket or something like that, if you arrange.
Just a little thought to get you set up and going. But I like to hold my bouquets, is just with a really open, loose grip here, like a C. And I'm going to layer these hydrangea pieces in and a little bit of just a triangular, tripod shape.
So you just have two on one side, one on the other side. So this is normally my long piece. And then I have a medium piece and a shorter piece. It's how I start them.
And then, I was a little gun shy to cut my weigela just because I wanted to see how the pieces could form in my hand real quick. So that's one thing that I did not prep in advance. But I think I'm just going to work with this hear. And we might adjust it as we go along. But I'm going to go for that one there.
And then, I'm going to clip this one. This is really one long piece. And I'm going to clip it into two pieces. So there is a little bit of a shorter piece. Just strip a few off of this to do a long piece.
Now I just strip these off of here. This would make a really sweet boutonniere or corsage ingredients. So you could put a little vase there to collect those pieces as you move along throughout your arrangements.
So I've got this one coming out to the side, this one here. And this one I'm going to put in the back and up high so that I keep everything balanced. Because I need to have room in here as well to place some flowers. And next, I'm going to move from this-- the weigela has a really bright, punchy pink that goes and fades to more of a light pink.
And I'm going to eventually get into incorporating a little bit of yellow in here. So I'm going to start with my darkest lupine that just a hint of yellow in it. Just hints of yellow, tiny little bit. I'm going find a spot to layer that in. We'll go just about there.
And next, I'm going to put in a piece of lupine that is even just a shade brighter than the one that I just put in. And it also has a hint of yellow in it, but a little bit more than the one before. So we're just slowly and gently introducing this next colored to the arrangement.
Next, we're going to go for yellow. I'm going to just look and see if any of them have a slight pink hue to them. And that's how I'll be bridging this gap. This one has just a tiny little touch.
So you can see how we've moved from dark to light. And now we're going to really fill out this yellow here on the other side. And then, when I'm trying to decide where I want to put something, I'm examining which way is that naturally pointing and making the line of the arrangement go.
I've got this going here. I think it might be nice to try this to be an upswing since we've been going down on the other side. It might be nice to have this pop up.
And I'm about to add some lady's mantle that will help support this a little bit better than it is right now. So this is a little bit of a heavier ingredient. Probably should have put the lady's mantle in first to support these since they're heavier.
So we'll just carry that color back through with two pieces of loop and ruff. But I'm going to wait, and I might come back to those after I put a few more things into the arrangement.
So next, the purpose of this lady's mantle, you can see how there's different spikes. This one in particular has pretty sturdy stems. So what I like to do with this is to place it pretty low in the arrangement as a little bit of texture. But it's also adding some stability so that as I continue to layer flowers in, they have something to catch on to and to be stabilized with.
So I'm working with five stems of this. If you're working with a lower budget, you could maybe just do three stems. It just depends what the big picture of what you're looking like is.
Have some in the front, and then working it back in this way. Again, going to fade this one little piece that I have just in case if coming back, I decide I want to add some more in. These ranunculus, I think these are going to act as a little bit of an accent flower.
So again, I'm looking through and I'm seeing out of all other ranunculus that I have, which one would be the best fit for the pallet in that particular spot. Because you can see, some of these are real dark, and then some are lighter. So what I would like to do is add a little grouping of three of them here.
Paying attention to the size a little bit as well. Putting the things that are the smallest at the top. This one has a little bit more purple as opposed to pink. And this one has a little bit more pink. So I'm going to swap that out.
And you want to have some void back there behind your flowers so that they can really pop out and shine. So you don't want to put it here, how that's on the same level. Put that up just a step above that.
Next, I'm going to go, and I'm going to pop one back in here. And this is not acting so much as a beautiful element of the bouquet as much of it stability element. I can feel that there's a little bit of movement back in there. So I'm just putting that there to hold some things in place. I'll turn around, and we'll work on the backside of it a little bit.
You can see, this is a great place for this ranunculus that was darker, and just a little bit too much for this area of the arrangement. Back here, that's a great little spot for that. It fits right in there with that weigela. And then this one's slightly darker. Brings your eye up and a little bit of depth.
And this one just a space filler as opposed to a [INAUDIBLE]. You just want to think about what's the purpose of the flower that you're putting in there. And you use the really beautiful flowers, the stars of the shows higher in the arrangement. And then some of these other ones that aren't as beautiful, you use lower in the arrangement.
Now back here, I feel like I'm lacking some ingredients in this area. So it's great to save-- like I said, we saved this one piece of lady's mantle. And that fills that in and takes care of that problem. I also feel like this one piece of hydrangea greenery is in the way of where am I might like to put a focal flower in the future. So I'm just going to tug that out, and add that back in here to bridge the gap between the lady's mantle and the end of this.
So I have these other ranunculus that are a little bit darker. But I think I'm going to pause on putting those in for now. And I want to experiment and see what these focal flowers could look like in here, and how I want those to be presented. Now that's going to happen too, where something's going to slide out of place. You can just gently coax it back in.
Something I'm going to do real quick is just to trim all of these because those lupine stems are thick, and they're a little bit heavy. So whenever they're rolling around down there, that can get them out of place a little bit as well. So if you just keep this trimmed periodically, that will help with that problem. And it'll also keep your hand in good shape so that it doesn't tire out too quick.
I think it's very predictable to sink things right in this area. And you can, and I think that that's pretty. And it's something that I like to do a lot. But have you ever thought about putting some beautiful focal flowers off to the side in framing the silhouette? Just another way to think about it and look at it.
So we've got this movement carrying back here the largest peony, and medium-sized peony and small peony. Oh my goodness. Look at this. [GASPS] [LAUGHS] Oh wow. We'll just let him hang out.
Now on the backside here, we can still catch the color of these two. We have this little stair step with the ranunculus that's really beautiful, and I think will frame this peony really well. Just going to pop that right down in there.
Now, I'm going just adjust this. I had it towards the outside. But I'm going to pop this right through the backside of the arrangement. And to make that just so that the orientation of the face is a little bit different.
To make that a little bit easier, you can trim the ends of your stems to be a little like a nail so you can just pierce through there. So much easier than struggling and forcing it. OK, so that again is carrying that line back that way.
A few ingredients left. Poppies, I call it a little finishing flower. And you can use them in different capacities, of course, but I like to use them as a little finish. Something to float higher in the arrangement, just to finish it off. And then I go back, and we're going to look at this base area of the arrangement as well.
Now again, I'm just noticing the colors. Some have slightly peachier tones to them, some more pink. So I'm just experimenting and seeing where would that one best be showcased.
Think we have the dark pink side over here. That loop and how you're carrying that. So I'd be privy to put over here in this area. You can wrap them in among some other flowers to get it facing how you'd like it to face.
I might come back and pop those in at the very end, but I'm going to move towards thinking about what's going on down here. So we have this exposed branch, so I'm going to adjust the hydrangea foliage a little bit. And then I'm going to add some tulips down in that area so we don't have anything that isn't really beautiful being showcased at some point while it's being carried. Just going to waterfall, I guess you could call it. I don't know, I think I just made that up, maybe.
Put those in there. And then I'm going to pop it off with one up here, higher. Let's look at it from this side. OK. So that carried the tulips further back into the arrangement, rather than having it be flat.
And the last thing I wanted to do was finish it off with some of these cute little apples down here, around the base. Hm, I don't feel like I need that one. I like to give it a little shake. These things can get heavy in your hands.
OK. I have some of these little peony leaves too left over. And these are great-- flat leaves are great for framing areas down here at the base. Just going to pop that in just down in there low.
I think I'm finished with that. What I might do at this point, if this was a bride's bouquet, is just set this aside. And I would go work on something else for a little while. Maybe I'd do like a boutonniere or two.
And then I would come back and look at it again because sometimes if you're working and you're solving all of these problems. When you're putting an arrangement together, you're solving a lot of little problems, like a little puzzle piece. And sometimes stepping away from it just for a few minutes, and coming back, get yourself some water, a little granola bar or something.
And then come back to it. You'll see things that you didn't necessarily see whenever you're doing it first. So that's what I'm going to do right now. I'm going to take a little break. Then I'll pop back in, and see if I want to switch anything up.
So I've stepped away from the arrangement. And I've come back, and I've quickly identified a few things that I wanted to switch up. So this is the backside of the arrangement. And I was noticing that I lack some color here. And I have an opportunity to carry this yellow a little bit further.
And I have these two stems of lupine left that we didn't use yet. And see how that went from being maybe not a whole lot to-- then this just being something that can pop in there and really finish that back section off so it doesn't feel so empty.
So that was one of my quick little adjustment. It carries this line with the lupine the whole way through, as opposed to just abbreviating that. And then, the other thing I noticed is that I really wanted a finishing piece back here as well. So I have this poppy that we didn't use that I'm going to incorporate back here. And I'm going to use that hydrangea leaf frame that little guy.
And then, the last thing that I noticed that I wanted to do is there's a spot right in here that I feel could lend itself to if the bouquet is being photographed from this side here. This little piece-- and I accidentally tugged off one of its petals earlier today. And I thought I probably won't use that-- but since we're tucking this down deep in here pretty low, we can actually disguise that pedal is missing altogether. So a flower that may have gone to waste otherwise can still add some beauty to the arrangement. Even if it's just the yellow center and all the petals come off, it's just a little pop of color happening down in there that I think would be valuable.
Great. So I'm going to call that finished. The only thing we didn't use were some of these were ranunculus, which were these pieces that we pulled off of the weigela would make a really sweet coordinating boutonniere to go with this. So sometimes with boutonnieres, I'll maybe order specifically one thing. But I like to use pieces from everything else that I'm doing. It helps it to all coordinate a little bit better.
I'm just taking the tape around the stems, going that way in one direction. And then I'm going to go backwards with the tape for a second. So that whenever I put my ribbon in here, I've got something to grab onto. And this little poppy just needs to be supported. So I'm going to wrap him behind the apples since he is falling down.
OK. A ribbon. This is just a simple satin ribbon from May Arts. It's great, all-purpose ribbon. And before I get that on there, let's trim this off a little bit lower. Feels like you're really trimming small. But the point of the flowers is flowers, so we don't need a lot of stems going everywhere.
So I've just folded that back, and then wrapping this around, just real gently. I'm going to go ahead and cut this free. Just want to arrange it so that it's smooth. If your stems are in the way or making it impossible for it to be smooth, just situate things a little bit. And get it so you can have a smooth stem wrap.
So right now, I'm on the backside of the bouquet. And I'm going to move over to the front because I'm going to finish this off in the front. So I'm going to put my thumb right here in the middle.
And I have this one little tail that's popping up. This is such an easy, fast way to do a nice, tailored edge quickly. This gets hidden back in here. And then right there, where your thumb is, you're just going to pop a pin in there. And that grabs both the wrapping that you've done, and that also grabs that second piece.
I might tug one more back in there, just to make sure that's really secure. And then that just drapes down like that. And you didn't have to do anything extra. It's just real fast and easy.
And now that I have this in my hand, I see where the ribbon's falling. I'm going to cut these stems even shorter to their finished length. And if I'm holding this in my hand, I just want a little bit popping down, don't need much at all. Don't want to cut it so short that it's not balanced, and that it's going to topple over on you whenever you pop it in the vase and travel with it.
It's OK to keep it pretty short. And you may, if you're traveling-- obviously, not today-- but I'm going to leave it a little bit longer. And then do this final cut once you get to the event venue so that there's a fresh cut on the flowers.
But I wanted you to see the end product as well. I'm just going to gently lay this little guy down. And just give these ribbons a final snip.
These are Joyce Chen clippers, and they're really great multi-purpose. They can go through wire. They can go through ribbon. They can go through the plants, branches. All kinds of stuff. Fabulous, fabulous scissors. If they get gunky, they're not good for ribbon.
All right. So that's it. That's our pink and yellow bouquet or tour of the mountains in May. [LAUGHS] Have a good one.
In this excerpt from the Team Flower Centerpieces and Reception class, I demonstrate one of four different styles of floral chair decor. This design is similar to making a corsage and is perfect for the back of the bride and groom chairs at their reception. It’s so simple—you just may be inspired to surprise your next client with a little something extra!
Watch Kelly put together a unique patriotic-inspired arrangement using stars and stripes. Learn how to become a florist and take floral design classes online with Team Flower. Here you can even learn tips on flower gardening for beginners. We'll show you how to do flower arrangements in flower arranging videos.
Transcript
[SINGING] Three cheers for the red, white and blue! Can you please include that? Today we're going to make a patriotic centerpiece for-- perhaps you'd like to have a party for the Fourth of July, or Memorial Day or any number of American holidays. Perhaps a president's birthday. Perhaps you're taking a trip to Washington, DC.
That's my favorite city, by the way. I just love going there and walking the streets. I feel like it's very inspirational. I think I might go there sometime and just make some flowers. So I'll invite you if I do.
Going to start by using elaeagnus, which is a type of wild olive. This stuff grows-- the place where I've seen it the most was when I was in the Outer Banks earlier this year. It was everywhere. And I am going to use that to get my base set up.
To set up my base, I went a little bit out of order. But let me take this out. So I like to go in a triangle just to get things started, with the long, short and medium.
Then go back there and put one tall-- I'm creating space for the rest of the ingredients to rest. Deciding if this is going to be a long and low or have tall points. Just seeing where the ingredients take me.
Sometimes, I plan where I want to go first, and then pick the ingredients based on that. And then sometimes, I do it the other way. I like to just see where things end up.
So that's the nice thing about today because I can just choose, and take you along with me. A nice refresher after you've been doing things that are more scripted. Like if you have to decide what you're doing for a wedding, or an event or something. Nice to just see what happens.
So that's where I am with my shape. In the back here, I'm going to add this a little bit more in the back so that I can balance this out back here. Just needed a little bit coming this way because it was leaning forward. Pop that in there.
Next thing I'm going to do is go in here and cover this area with some lower foliage. And I like this to be a different shade and also a different shape when possible. So this is a little bit bigger, different texture.
This is celosia, a different kind. We had some peach in another lesson. This is the red kind. And we're going to go right in here, pretty low. And we're going to cover up this area in here where the bowl is and prepare to add some flowers.
So I'm still going around in a little bit of a triangle, just to get started. Then you can jump out and go crazy. Sometimes, if I have like a lot of different greens I'm using, I like to use one kind of green on one side and the one kind of green on the other side. But this whole way of getting your base established I think's really important, regardless of whether you're using the same ingredients again and again or you're using the same one.
I want to take this a little bit high here to reach up and hang out with that for a little bit. But had to go back down low and do the work of the celosia, which is to cover up the base. You can see I'm just trimming from the same piece several different pieces. And I'm talking away that piece that I cut out in there deep inside the arrangement, so that you won't see it. Let's do maybe three more pieces, just to get some good coverage down there.
Like that, like that. Just need to put a little bit more back here. I have a little bit of an opening. Put some more in there. So that celosia, I'm going to save a little bit in case I want to come back and add some more later.
The next thing I'm going to add is a flower that will cover the base of the arrangements. So this is going to go after the celosia. It's going to go in nice and low. This is a variety of hydrangea that blooms earlier in the year up here.
So a lot of times, the temptation is to start going high with your flowers. But you really want to keep these deep. They all have to do their job, right? And you can bring some of them out longer if you wanted to. If you wanted to show it off, you could bring it out more.
But the main reason why I chose these was for that purpose of coming in low. So anyway, I have this one left over. I'm just going to keep it.
I might bring it out. Well, let's just do it, and then take it out later if we need to. So we're just carrying the carpet out here a little bit.
Next, I'm going to add-- see, I'm having this thing where I can't decide between these two. And I think it's cool to go with both of them, so I'm going for it. We'll see where we end up.
This has a lot of different names, it's cute. Gooseneck. Sometimes veronica's what you ask for wholesale. There's just a bunch of different varieties. It's all pretty similar. Similar shape and everything, so gets interchanged a lot.
And I'm going to use this to follow the main shape that I started. Take some color out long. The purpose of this one is to reach. Everything has a purpose. Each person has a purpose.
Each time the season. Foods have different purposes. Fun to think about, how different everybody is. It's a good thing.
So these are my stripes. I'm going to add some stars in a little bit. I just have one more. And I want to put it-- you can see, everything's out far. And I want to add one that's a little bit closer in to the base.
Actually, let's put them back here. Perfect. Didn't like that place.
Then you go for the fox gloves next. These serve a similar purpose. But I think I can mix them all right because they're two different sizes. So similar shapes, and they both have many flowers on a stem. But since the fox glove are really big and those are smaller, I think we can all work together and be in a happy place.
Sometimes, if you're making something and it doesn't look right, check the sizes and the shapes because you might be competing. That can throw you off sometimes. I'm just going to focus this in on the left side of the arrangement. Going to do something different on the other side.
This is nicotiana. I've seen this in a smaller size, which is actually what I prefer. This is big, and honest to goodness, it is so hard to manage. Just it's heavy, and how it sits is a little bit tough to manage. So you just have to be careful with it.
But the other variety that I really like to use is just much smaller and it droops over completely. And it's just really sweet and fun. I love it so much. These are just a little bit heavier and harder to manage.
So just have to maybe edit them a little bit. Actually might just take that off so I can plan where this bloom will go. So these are the stars in the stars and stripes arrangement.
I was at Chick-fil-A a few days ago. My usual granny meals. And anyway, Buster and I, we were eating our sandwich. And there was this really sweet man. He was over there, and I was waiting on something.
And he said come over here and sit down. And so anyway, I went over and sat down. And he told me all about how he served in the military for-- well, between him, his son and his grandson, I think it was 93 years combined. And it was really fun to listen to him and hear his story.
So I have stars in there. I'm going to put one more back here. See how I don't have any there? Going to add that.
Now I have these red lilies. I think I'm going to add that in next so I can get an idea how this wall will finish out. Just have one prize lily, so don't cut too short. That's where that's going to go.
Oo, golly. Think I'm getting some bug bites. Another fun part of this time of year. Those lousy mosquitoes.
All right, this is bee balm. Real fun one. This one grows-- oh, man.
My mom grew this in the yard growing up. And it blooms here in boon right around the 4th of July along the parkway where we live. You just saw it out today.
So I'm going to make a little line down the back of my arrangement with these. And I have one prized zinnia, so that'll be my little focal moment over here. I'd love to have more than one or a bigger one. But sometimes you got to work with what you got, so that's what we're doing. Fun.
This bothers me. It looks like you're just hanging out here because the stem. So I'm going to just tuck it in to go more along that line that I started out originally. That's a little bit better.
OK, my one zinnia. Going to tuck it in back here. I don't know, guys.
I wish I had a few more. I'm not going to go for it. This is just going to be the back.
But see how they all are about a very similar size? Just looks weird. So put that in a bud vase somewhere.
Have some blue to add in. This is delphinium. My friend Lee grows this.
You can get this pretty easily wholesale too. I think it's a really sweet blue. It's hard to find a true blue in the flower world.
A lot of times, you've probably experienced the frustration of the wholesaler sending you something that they said was blue but actually it was very purple. Just hard to find true blues in the flower world very often. But I think delphinium's a good one.
And then I have forget-me-nots today as well. We're going to not forget all of the people who have served. And the families who've supported them and have also served a great deal. So this one's for you guys.
And I was trying to keep the shapes of all the flowers whenever I was setting up for this one to be-- I don't have a big, round peony or anything in this arrangement. Well, it would be nice and it would look pretty. But I wanted to keep everything stars, and fireworks and things like that.
So we have a little blue moment going on over there. And I'm going to finish it off-- well, maybe. I might add some Queen Anne's. Queen Anne's will probably be-- I'm just going to put one of those down in here since I don't have more zinnias.
It'll be all right. Put a little trio of three of them back there. And we'll punctuate the little line of three with one more there to balance things out.
And then the last one, the forget-me-nots. I like to group these together since they are so little, to put a little handful of them together. Put them in as a team, this little group.
And while I'm here, getting bit by a lot of mosquitoes, I'll be happy to tell you about my favorite mosquito repellent. It is by Burt's Bees, and has a little green label on it. It smells good-- I don't mind the smell-- and I get bit a lot. And it really works better than DEET or anything like that on me.
So if you're one of those poor people that just gets eaten alive. Think I'm going to regret this arrangement but not regret it. But I think I'm going to be very itchy the next few days. Love you guys.
That's my patriotic arrangement. I'm going to put one more back here. Then I'm going to call it a day and run for my life. There you have it. Wishing you all the best, and lots of success [LAUGHS].
I love the lightness and brightness poppies bring to an arrangement. I chose maidenhair fern (generously misted each day) and spirea to keep it all pretty light — along with a few kumquats at the base to anchor it to earth. Watch this fast flower tutorial come together!
In this clip from the Team Flower Foundations for Growing Cut Flowers class, Kathleen and Kelly discuss various seed germinating containers (or seed starting trays) and the pros and cons of each. They’re sharing helpful information for both beginning flower growers and experts—all are welcome here! Watch to learn which containers are not recommended and why as well as a few tips on how to best utilize the systems that are available to you.
Should you do mock-ups when in the consultation process with a client? It's a popular question and Kelly weighs the pros and cons in this video. She'll also share how you can use a mock-up internally to help in the process, even if you never show it to the client.
Transcript
We're here today to talk about mockups. Mockups are something that occasionally clients will ask for. Sometimes clients, depending on your business model and who you are serving, they may ask for them frequently. It might be something that you already offer or include in your packages. It might be something that you don't and you're wondering how can I handle this? When is it a great time to do a mock-up? When is it really not a great idea to do a mock-up?
So I think that what we're looking at here today is for an event that's happening later this month. And while it's really difficult to copy something exactly, this is a really great way for me just to get an idea of how much time it's going to take to complete the project. An idea for this piece, in particular, it's being suspended from a tent ceiling. So I wanted to have a general idea of how much it will weigh so that our rigging and all of those kinds of things are safe and and thorough.
I also wanted just to test and see how full things could get. The ingredients that I'm using are a little bit different than the photos that the client and I had reviewed and looked at together. So I just wanted to take a peek and see, well, can we actually maximize their budget by just adjusting some of the flower varieties, choosing things that open wider than maybe what was pictured.
So this event is a larger scale event. And whenever I'm doing something that is bigger, it's great to get those recipes down perfectly. Because if you overshoot, you overshoot by quite a lot. If you undershoot, you undershoot by quite a lot. So in this case, for me, it's really helpful to get an idea of exactly what these things could look like.
So I had some flowers left from the wedding that we did previously. And whenever I'm experimenting and putting things together, a lot of times after a wedding's over if there's flowers that they didn't want to use or that were being discarded, I'll just pull them together and put together just a quick little mock-up.
This was something that I haven't had a need to do before. So I wanted just to test it out and see so that I felt really great about it. It's a win-win, because now I know how many people I want on the project and I know exactly where the Oasis will go and just a little tweaks that can make that will make things so much easier on event day.
Something that I noticed when I was putting my pieces together for this one was that the candles that I had chosen, even though I bought the holders and the candles from the same place, they don't fit into the holders properly. So now I know I can save a lot of time on event day by just taking some Saran Wrap now and wrapping that around the base of the candle. And then this gives us some stick and a little extra body whenever it goes into the candle holder. So you just get that tidied up. And now it fits down in there and there's no wobbling around. It's a nice, easy little fix.
I also took note that I wanted to have some flat leaves that went underneath each of these candle holders. So that just in the event that there was some wax that dripped, I want to keep that away from linens as much as possible. So I'm just going to underlay each place that there's a candle with the foliages.
One more a little candle tip that I picked up somewhere from a friend, but I thought oh goodness, I'm going to get out those white gloves. That's a great way to save some time and to up the ante a little bit. But back in the day I was little tea party queen. And so I have all these fancy little white gloves.
And these I see at antique shops all the time. And I'm sure you can get them. I'm sure you can also just get them on Amazon.
But now whenever you're pulling these glass hurricanes out of boxes and putting them into place and maybe you see fingerprints or a smudge or something, right here, you don't have to carry around a bottle of Windex. You can smooth them and take care of it right there. So you're avoiding getting fingerprints on your glass in the first place. And then, if you happen to see a little smudge or something that you want to clean up, you can just take care of it with your magic gloves. So those are a few things there.
I'm going to go ahead and take apart this so that you can see the behind the scenes of what's together. It's not perfectly manicured and put together since it is a mock-up. I just did like the front half of everything. And then I can easily multiply. So that's a way to save some costs if you did want to mock something up.
Another little tip like these things here, once they come out, then they can go in and they can test out fullness for another type of arrangement for an arbor or something like that. So you can really reuse, reuse, reuse and get a great idea of what the pieces will look like for the full event
And it's also a great opportunity to snap some photos for your Instagram or some other things that could be helpful to grow your business. Maybe after it's all apart, you want to take some of these things apart and donate them to the hospital or you want to take them to a local business with your card or something like that. So there's a lot of ways to use and to make the most of these blooms even if they aren't being sold. You can use it in some of those ways as well.
So what I've done here, whenever I do the actual event, I'll have some pre-made garland coming in, just a base that will go the whole way down the table. For today, I was pulling some things out of the yard that I could use, again to save costs on the mock-up.
So I am going to show you. What I have here is a little block of Oasis wrapped in chicken wire. And I have all of my flowers for the garland tucked in here. And then I'll also do a little bit of foliage in here on event day.
So this piece I'll be able to make an advance. And then whenever I arrive on site, I can take my garland, have it run down the tables and then just simply attach each of these little blocks of flowers. They're all in water and ready to go. So that makes for a really quick and easy install.
But what I have done just for the mock-up here is I have taken just bundles of foliage like this. And I've wired them together. And I've laid them down the length of the table to get that garland base. And the ingredients that are in here, I have some forsythia, oregonia and oak leaves is what I had pulled for that. So that's same thing that's happening here. Just multiplied down there, down the side of the table.
Now let's talk about what's going on up here in terms of mechanics and what this looks like. Whenever the event is actually taking place, there is a custom box that the rental company has built that is 32 feet long by 16 inches deep. And the most similar thing to that I have available to me is a simple lattice from the hardware store. So we'll take this apart so you can see what's in there.
Let me just get rid of these little glass pieces. And I'll be right back.
All right. I'm back to pull this apart. Here is my trusty StepRight ladder by Werner. This is my favorite ladder. It looks so rough because it's been loved so well. But there's a little spot here you can put a little mini bucket to have your zip-ties, and your scissors, and all those kinds of things in. And the steps really wide. So it's nice whenever you get up onto the top step, you have like room to work.
So I'm going to pull this apart just in the reverse order of how I put it together. My finishing foliage in this arrangement was the smilax. And I did smilax in the beginning and in the end. So I weaved it through the arrangement right there at the end to soften things a bit. So I'm just going to pull that out so you know that that was in and that came out.
And then the next thing that I had, reverse order, so the last after that what I put in was a bunch of spray roses. I did a few at the end and a few at the beginning. So it's really nice to have a base and to get that color spread out among the length of the piece. And then it's nice to also go in there and like finish it with a couple ones that come out even further than the main focal point roses, just to soften it a little bit. So I'm going to pull a couple of those out.
OK. Next thing. These roses, I used two varieties, quicksand and wedding spirit. And I put in quick sand first. I made a little line with them. And then I followed them. So each little area had a little pair like this that followed along in the line just to add some fullness, body, different shape. And I really love how those two color tones work together. So I like that a lot.
These wedding spirits, if you give them just a little bit of help, they can open to be really gigantic. So this is easy to do whenever they're a little bit older, softer. And the pedals need to be moisturized. So a little crowning glory or a spritz of water on top makes it easy. And just gentle, gentle hands so that they aren't bruising.
Can't do it with every variety of rose. But I mean hello, look at that. This is our little before was. So you can see that really makes a gigantic difference.
So I had like a concentrated moment here, and then a little puff here a little puff here. And then on the table below, I had kind of a medium size that came down right in between these two to help puzzle piece the whole look together. Since they're going to be seen together. OK.
I have a couple that trailed down underneath. Also had a few dahlias in here, but those don't hold as well as the roses for something like this where I was using flowers for a couple of days. So they've gone on. They've had their moment.
And I wasn't real concerned about getting all of these into a water source. I will on the event day. There's a little piece of Oasis here. One in the center here that will be used for the top both front and back. And then there will be another little Oasis square back here.
So we have flowers that are concentrated that start here and go out. And then at the top, that's our way of getting things to come up, but to be centered and balance back in the middle. And then also to have room for a little couple of things to come out under here.
So just like whenever you're doing a simple table arrangement, that physical balance is really important. So that's why we have Oasis, Oasis on the end, those two ends, and then one right in the middle. So we don't have like wonky weight happening.
And then some of these connector pieces that you saw in here. I might add just a tiny, tiny little piece of Oasis in here, or use little water picks. Or if it's happening like right away that day, and like those wedding spirit roses, and even the quicksand, they're so tough. They don't even necessarily need to be in a water source for that kind of event work where it's something that's happening.
As long as the pedals are moisturized, they do quite well out of water altogether. If you think about how they're shipped to you, dry. They are kept cold. But if they're well-hydrated before they go in, they've got time before they go down.
So I have two varieties of hydrangea in here. I have the little tardiva. You also will hear it called like quickfire or pink diamond, the cone-shaped, lacy hydrangea. And I have one here and here. And then a set of, there's technically four, and then this little guy was up just little bit higher. So there's five, six, seven. This is a nice way to get some texture into the arrangement and to start building color out to the side. So that's the function of this piece. I love this ingredient. Take it big, take it little.
If you're looking for some things to plant at your house or to have in a cutting garden, I think this is a really great investment. They're not an inexpensive plant, but they give a lot. And they can be used in a lot of different ways.
Forsythia, that you see in here as well, this is another great one. This can, late in the season, does really well out of water. So none of the forsythia that you see here, this has been used and in and out of water for a week now. So it's very hardy. We also have this southern smilax which is great out of water as well.
These are a little limelight hydrangeas. And by little, I mean they're actually quite large. This is one of the things I keep both of these kinds of hydrangeas in the garden. But these can get even bigger than this. And you can cut them apart and use the top in one place and the bottom in another place. Great coverage. OK.
Got all the flowers out, that second round of spray rose I had mentioned. I'll take the smilax out. And this I have weaved among the lattice to stay in there. And it's great because it creates a net, all of the vines, and moving around it, creates a net and adds support to the arrangement. So whenever you are using water tubes, and that kind of thing, the flowers have a place to stick and to live.
I think Jesse's grabbing this back side. So you can see how the back I didn't finish that out, but I'll just multiply by two to get my weight and to get my flower quantities. OK.
Last thing is the forsythia that I have in here. It is zip-tied and tucked into Oasis. So bundled it up and just zipped it right on there. All right. Off because that Oasis piece. This one I had secured in three spots so it wouldn't twist on me.
There you have it, the little lattice piece that we created everything on. So maybe you don't have little stands like this. These were something that we had dad put together for me for a friend's wedding long, long time ago. Ah, man. How long have they been married? Probably 8 or 10 years now. Anyway.
So if you don't have that, another thing you could do is just set up two tables. And you could create it right here at this height. And you could have a table here and a table here to balance it out for you, saw horses, really anything that you can just suspend this on and to have a little flat place to work.
Now something I was thinking about whenever I put it together. I put it together as it would be so. I left it up here this way. And I did the top. And then I kind of crawled underneath a little bit and did the bottom. Depending on the design that you're eventually trying to get to, with this having some more drape foliage and that kind of thing on it, I think it was helpful to do it this way.
However, whenever I put the forsythia on next time, I think my preference would be to have it upside down and line the whole thing with forsythia and then flip it over and start doing my Oasis up here and adding in the forsythia coming down the sides and more of the shape of it. But for coverage, as I was doing it, I was like next time I'm going to flip that. I'm going to flip that over, cover the whole bottom so that that's all taken care of and covered in and then flip. If I did something like that again and was like picking up and delivering.
This all, since this isn't the structure that I'll be using or suspending from since we have another one that's coming in, all of that will be done on site. So we will be assembling it like right there in the air. It'll be hung at about chest height and we'll go from there starting with the forsythia and the smilax and working in the Oasis and the spray roses, and the regular roses, and back to the spray roses. And we'll have-- oh, and all of the hydrangea, of course, too, before the roses go in.
But anyway that's a little undo of the mock-up. And I hope you enjoyed it and it helps you whenever you're trying to decide, should I do a mock-up, should I not? Putting together a big piece, how should I go about that? Here's just a few ways that you could do that.
Just another quick word on mockups. I think that whenever you do anything in your business, it really does need to be win-win for you and for your clients to keep you in a place where it's sustainable and you're moving forward. If you started offering mockups every time and you did it for free, it would be helpful to you, it would be helpful to them. But your profit margins are going down. So that's kind of a minus one for your side of the thing. Now if they paid for it, then OK. Then there you go. So you get something that's working and that's moving around the whole way and that it works for both parties.
Every situation's a little bit different. I don't typically do mockups, but since this was a place that I'd never gone before on a scale I haven't, I thought it would be really helpful and wise just to invest a little bit on the front end. My client didn't ask for mockups, but she'll be excited to have them.
With timing on mockups, something that I think is a little bit of a risk, is showing somebody something the month of their wedding. I know that the flowers are probably a closer fit and all those kinds of things whenever you're doing it really close in. But if there's something that pops up, there's just a lot of stress going on. So they might be like oh, I hate everything. And you don't want to be in a place where you're like redoing everything. But actually if you showed up on event day and it was there, it would be fantastic.
So that's something to think about and just to gauge like is my client-- how is my client feeling right now? Is this something that's actually going to help them or will it make them doubt their decisions? Or will it make all of us feel great? So that's something to consider whenever you're thinking about if you want to offer it and the timing for that as well. So those are my thoughts. Thanks for watching. We'll see you soon.
There are some roles in a wedding that are often overlooked when it comes to floral design. In this excerpt from the Team Flower Bouquets and Personals class, I’ll show you a unique approach to dressing up the role of ring bearer by making a pillow out of hosta leaves. All of the materials used are ones that can be easily found in your own studio: ribbon, a small round Oasis cage, and snips.
In this springtime video, Kelly will show you how to pull together an arrangement perfect for an Easter lunch table. Learn how to become a florist and take floral design classes online with Team Flower. Here you can even learn tips on flower gardening for beginners. We'll show you how to do flower arrangements in flower arranging videos.
Transcript
Hi, I'm Kelly Perry with Team Flower. And I wanted to share an Easter centerpiece with you today. I'm reading this book called Flower Arranging Through the Year, by Daphne Vagg.
And in it there is a little idea. They call it pot-et-fleur. Literally means pot in flower. It evolved about 20 years ago to describe an arrangement of growing plants that are still rooted with a few cut flowers.
At times of the year when flowers are scarce or expensive, a pot-et-fleur can provide a type of decoration which has never really enjoyed the popularity it deserves for its economy and long life. A well-planted and cared for bowl will last for two or three years.
Well, maybe not if it lives in-- maybe not if it lives in my house. But if you're a good house plant person and very attentive, this is a great idea.
I love the concept behind it. In the book that they show here, they have some begonias, succulents, dusty millers, ivies, things like that. And then they've added in some little lilies.
A great idea to have some simple house plants that then you can, throughout the year, go back to and simple little if you need a little extra in a boutineer. Or just to have something fresh and growing in your house all the time that you can then take things they're blooming outside and add into your bowl, just to keep things fresh and fun. But it doesn't take maybe quite as much work as an arrangement.
So that is what we're going to do today. And I am using some things that I would probably plant these things out. It's not house plant kind of materials. But these are things that are available at the garden center now.
And we're going to plant them, pop them up here for our Easter bowl. And then after frost passes we're going to go ahead and plan these things out in the garden.
So my version is not as strict. But that's something that you could do is plant the house plants. And then follow the same kind of set up and concept to have something that's fresh and growing throughout the year.
So we are going to start by taking our terracotta pot. And I'm going to flip it upside down. I'd kind of like to age it a little bit, but I don't have time to go through the whole process of covering it and letting that process happen.
So I'm going to do a quick little cheat. And I'm going to just use some chalk. Some simple classroom chalk or some sidewalk chalk if your kids have some.
And I'm just going to go back and forth on my bowl with the chalk. And then we're going to smooth it over and kind of blend it all together just with a towel.
You will, of course, want to be careful when you pick this back up to take it in your house so you don't have chalk all over the front of you. But this is just a really quick way to get some interest, and texture, and age to your pot instantly. It's fun.
Kind of like we're giving her some makeup. Putting on the powder.
Now next, we're going to add some-- get a base level of some potting soil in here. We'll go back over where I just put a little thumb print. OK.
And I'm just using a simple Miracle-Gro potting mix from the hardware store that has some nutrients for the plants in it already. This is only designed to last for a little while in terms of nutrients for your plants. So you'll want to check the brand and the bag that you have to see what's in it, how long it will last, and what you'll need to add or supplement to keep your plants looking great long-term.
I know a lot of times with house plants-- I'm getting a little bit better at them. But I was on a real losing streak with them because I kept getting insects in the soil.
And so I did some Dawn dish detergent and have been doing flower food in them regularly. And that's really helped. So maybe my black thumb of death is going to leave here pretty soon.
OK. We're going to add these first. They're just a sweet little-- what was this called? Saxi-- frage? Fr-ah-g? Did we look this-- we looked this up and-- oh, man.
If I haven't heard it said before. I have a tough time with that sometimes. But it is spelled highlander white. And it's S-A-X-I-F-R-A-G-E.
I'm just going to break up this little bit at the bottom so that the roots can move around in the pot. And I chose two different ones. This one has more compact flowers and this one was a little bit leggy looking. But I liked that because I can have this one that is doing a little bit more movement come and drape down the front like this.
So I'll tuck that little baby in the there. I'm going to add-- I have some different kinds of lettuces. I guess this is a lettuce, a kale, and I think this is cabbage. Yep. A little bit of cabbage.
That one I lost. I tell people a lot with cut flowers, feeling the flowers to know if it's going to hold well for use a cut if you're cutting some things from your garden. If you feel lettuce it feels very tender and soft. And then if you feel this cabbage down here it's very leathery.
That Cabbage will do just fine out of water. But the lettuce, you'll have a little bit more wobbling around. And we're experiencing that even now just here on the plant. The cabbage and kale over here, same thing.
And I wanted to have a little bit of lettuce in here. Have a little spring garden. Thought it would be sweet. So we'll see how it does.
Let's put a little thyme in here next. Thyme is one of my-- this is a lemon variety. I love thyme.
It's very sweet smelling. It's great to have on hand for cake decorating flowers if you do wedding flowers. I like to use that on wedding cakes a lot. Of course, I make little cookies and Jesse and I had it in scrambled eggs the other morning.
When I was choosing these plants at the garden center I was thinking about the different shapes of the leaves and how they might look grouped together. I wanted to have some varieties, so that's why we have long lettuce leaves.
And these cabbage leaves have just a little hint of purple in them, which I really liked. Just add a little bit of depth to our green. It's, of course, primarily green. But I wanted to have a little hint of color.
Now This, you could plant the whole thing in the ground I suppose. I want to liberate it for what we're doing.
It has become-- the roots have come bound around the bottom of this. Try not to disturb them too much but let them go free so they can keep moving.
Easter is one of my favorite-- well it is my very favorite holiday. So I'm excited about this one. Parents are coming down to visit. And we'll have our little brunch with this centerpiece.
Nice thing about these is you can do them in advance and keep an eye on them, keep them watered, and happy. And that's one less thing you have to do when company comes. You don't need to be arranging fresh flowers. You can just touch your potted arrangement up and pay attention to your guests.
OK. I think I'm going to reserve these last two, just in case we need them. And I'm going to fill in with a little bit more potting soil. Then we're going to add some fresh flowers.
And these daffodils will be-- they will be all done blooming. They will have lived their life by Easter for me right now. But there will be more in the garden when Easter rolls around and I'll run out pick some more.
Same with-- I think we're going to add some forsythia to this. It's a great plant to use.
But again, that forsythia will actually very likely still be looking great for me around Easter. Forsythia is one of those flowers that roofs in water. And those kinds of things are always very long lasting in arrangements.
I don't know if you've ever noticed ivy. If you cut ivy and put it in a vase, it will start to shoot out little roots at the bottom. Maybe after about two weeks of being cut.
And forsythia acts the same way. That's how it spreads in the ground and multiplies is by putting out roots. So that is a great, great cut. Great thing to have in your garden if you don't have already. OK. Cute.
So to put these flowers in, I'm going to use some little water picks. But I wanted to show you a few other options.
In the book, whenever they talk about putting together the pot-et-fleurs, they have thin little containers or little vessels that they actually plant in the soil that then they can put their little bouquet in. So I wanted to show these. These would be great little things that you could plant in there. With what we're doing with it being so low and just the shape of what we're doing today, this isn't what I need.
We could, if we wanted to, perhaps use this. This is a little pin frog cup that you can put a little bit of water down in here. And then you have the pins that you can set the flowers in and around.
So I'm going to just-- there's a little place right here that I've created that would be fine to put that in. Since it's green it mixes in with the things that we have. I'm just going to put a little bit of water in that.
And since I might want to put some flowers in a spot other than this or maybe just one little flower over here, I also have some water tubes to use as well. And they just look like this if you haven't used them before. They have a little poke and you just poke it down in there. And then kind of hide the mechanics of that as needed.
So I'm going to start with the forsythia. And I'm going to use this to create the kind of more interesting shape at the top. We've filled in the base of our arrangement. But now opposite of this rosemary that's probably the most prominent thing that we have coming up, I'm going to do the forsythia right over here.
And I'm not getting real serious about precisely how this is going in there. I want it to feel casual and just that it was a walk in the garden. But naturally, just because that's how my eyes bend, I'm thinking about the lines and the movement that I'm creating in the arrangement with the pieces that I put in.
And then the little daffodils. You can see how they get this little-- where they've been living and forming. You can just pull that off and liberate the flower. So there she is. Glad and ready to roll.
I'm going to take a quick peek at my flowers. See which ones are the biggest, which ones are medium, which ones are small. That helps me as I place them.
You place larger flowers at the base of the arrangement and smaller ones higher. It feels a little bit more grounded, I guess is the word you could use to describe that.
And as I place the flowers in, I'm thinking about just putting maybe one a stair step above the other, rather than crunching them together. Because I want this to just look like they're growing there.
And as you go out and gather your flowers, you don't have to use daffodils. You don't have to use forsythia. Use whatever is in your garden.
But notice as you bring it in and as it's growing there, just the natural bend to the flower and how it seems to grow. And if you mimic that kind of look as you arrange it in the bowl, you'll get a nice garden feel.
So I'm going to show you-- I have this one in here and I'm going to take it out. And I'll show you why I think-- I mean it could stay there.
But I kind of think it's a stronger composition to me if I just pull this out and we have that. These were kind of on the same level and similar. So I'm just going to readjust how this one is facing. Maybe use it a little bit further back in the arrangement.
So now I'm going to work this angle. And see how as we do this we're creating depth in the arrangement. You can tell that it's moving backwards here just a little bit more. Movement.
You really could, I think, stop there with the flower placement. What I might do with some of these other smaller daffodils that I have is just create a small little grouping in a little bud vase and put these in front of each person seat. I think that would be a sweet way to use the rest of these.
And I wanted to add in my little bunny here. I have two younger sisters. And the one next in line to me, her name is Kristin. But we-- from the day she was born she just looked like the sweetest little snugly bunny. And the name stuck.
So this is little bunny right here. She can't make it down to Easter. So we're going to put this little-- we're going to put this little bunny in here to remember Kristin. I think we will put that right here. Cute.
And just these last two that I have. There's a little spot back here. I'm going to fill them in.
OK. I think that took care of that. I think we're done.
Another thing you might want to do down the ends of the tables. I know everybody's dinner tables are a little bit different. Some people are eating family style. Some people are having it on a buffet or something like that. So just a few other things.
So the daffodils in the bud vase is another way that you could add and make something with this. And then there are little sweet terracotta pots that you can get at the hardware store. They have little tiny mini ones too. That might be something that's sweet that you could put at each person's place setting.
And I also have some carrots and I have some cabbage leaves. I took some leaves off. And I have the actual cabbage head here. You can arrange these down your table and make it sweet and special.
Or you might even consider using one of these cabbage leaves as maybe a place card. Maybe you paint, just with some little-- bit of acrylic paint, you paint their little name in there as a place card. Or you could serve a chicken salad in it, you know. Whatever you think.
But there's so many sweet ways you can use something like this. And what a beautiful leaf, all the colors and veins within the leaf. So those are a few little ideas for you with that.
I already mentioned planning it out after you're finished using it as your centerpiece. And don't want to forget to give it a little bit of water here before we sign off as well, since we've disturbed those-- disturbed those roots, go ahead and get them some water back to their way.
So that's what I've got for you. Wishing you a wonderful, wonderful Easter. And hope that you enjoy spring and all the beautiful things that it has to offer.
Talk to you soon. Have a great day.
Wiring is a valuable and specialized skill that can add value to your business and set you apart as a designer and freelancer. Kelly explains why wiring is important—as well as when and where to use wired flowers—in this excerpt from the Team Flower Advanced Techniques for Wiring fast track class. The wiring technique gives you a lot of control over the exact placement and orientation of each and every bloom in a piece—if you need your focal flower to bend in a certain way that is not natural for its stem, wiring makes that possible!
In this excerpt from the Team Flower Elements and Principles of Design class, Kelly demonstrates the principle of movement by creating a minimalistic floral arrangement using complimentary colors. Complimentary colors are opposites on the color wheel (orange and blue, purple and yellow, and red and green). She uses caladium, firecracker, and green trick dianthus to demonstrate the most difficult of the three groups: red and green. This is a color palette that typically reminds us of Christmas, but it can be used to create a sweet summer piece as well.
Pricing is often a sore spot within the floral industry, and it’s one topic I’m very passionate about. Floral professionals are easily overwhelmed with how much to charge for their services, but with the right mind-set, this obstacle can be overcome.
In this quick tip video about using succulents in an arrangement, Kelly will show you a tip how to elongate the stem! Learn how to become a florist and take floral design classes online with Team Flower. Here you can even learn tips on flower gardening for beginners. We'll show you how to do flower arrangements in flower arranging videos.
Transcript
I wanted to show you how to wire succulents. And by wire, I mean I'm gonna stick a big bamboo skewer through it.
I like to pull off these little lower petals.
And then I just take my bamboo skewer and I line it up right there on the side. And then I look for the stem tape that is the closest color to the succulent that I'm using. And I just wrap it around like this.
Very, very simple.
For succulents that are really big, I like to poke a little whole in the top of it and then put in some-- just a tiny little dab of Oasis wet glue. Let it get sticky for about 10 seconds, and then I put my skewer in that and tape down the stem just like I did with this one. So this is ready to pop into a bouquet, or you can clip it off just like you would a flower stem and pop it into your arrangement. I'm gonna do it one more time.
Clip as long as you can from the base of the plant. Take off the lower level petals.
And I'll just reuse this skewer that I already wrapped. Gotta get [INAUDIBLE] of it.
And just tightly, firmly wrap it to your skewer.
That's it. Very easy.
And just because a succulent isn't completely perfect, doesn't mean you can't use it. If part of these petals, if it was kind of one-sided and some of these petals over here didn't grow quite right, you could just tug that part in towards the back and then put those pieces that still looked really pretty out as, like, a silhouette around the bottom of your container or something. So you can always use the flowers. And use every little last bit that you can.
Just be strategic.
So there you have it. Little succulent addition. Hope you enjoyed it, and hope that encourages you to go try it for yourself. Have a good one.